Wednesday, December 7, 2011

WIP Wednesday... or not.

Oh MAN! I got all excited that I would be able to link up this week with all the other Work In Progress Wednesday sewers over at Freshly Pieced. After many weeks of little or no progress on anything vaguely quilt related I have gotten a few hours of crumb piecing in during the last week trying to come up with the border length I need to finish my crumb quilt Hearts of Gold. Unfortunately, Freshly Pieced is taking a holiday break from WIP Wednesdays so I have no one to link up with. Oh well... there has still been progress, link up or not!

I have these and a whole string of others, plus the 4" squares I have left from the original 40 I made this past spring before I even began the main quilt. It felt really good to sit down and piece again. I am hoping to quilt the flimsy I had up on the design wall at the beginning of the week...


I decided on both the gold and the red for the ribbon and it is all fused down and ready to be sewn. I think I am going to add some machine done trapunto under the wreath when it is ready to be quilted. That should add some dimension to both the wreath and the ribbon. I hope to add some texture and 'drape' with the quilting. I just need to work up my nerve. It has been a while since I quilted anything and the last time it was a nightmare because the machine kept misbehaving. That issue was never resolved and I ended up tieing that quilt. I am not sure I want to go through that frustration again. Let's hope the machine plays nice with this one!


Monday, December 5, 2011

Holiday Design Wall

This part of December leading up to Christmas is always so filled with decisions... what should I get him/her? Will they like it? Where should I buy it? Can I really afford it? I thought I would add a few design decisions into the mix!

Last week I remembered a holiday flimsy I have had in the closet for a few years. It is a holiday wreath done in the watercolor technique using fusible interfacing to compose and fix the pattern before sewing it together. The set of prints I bought for it had a great border print that went with it so the top as it stands was a slam dunk once the middle was done. It is around 60" square or so... a bit of an odd size. Too small for a throw, a little too large for a wall hanging and I always felt like the wreath was lacking a little something. I had thought about some sort of applique ribbon or bow on it but I had NO desire to try to hand applique through the layer of fusible interfacing and that was what I was most familiar with. So, like so many projects, it got put away awaiting further inspiration.
Then this spring I pulled it out to show my quilting ladies as an example of the watercolor technique. Also this spring I came across the Don't Look Now blog and read about her raw edge machine applique technique. I even tried it out making a hair bow keeper/organizer for my daughter. It eventually percolated through my head and I realized that could do that on the wreath! So, with the holidays approaching I thought I could pull that out and actually get it done before the holiday... maybe... OK, don't hold your breath. But at least I could get some embellishment on there and see how far I get quilting it (that always seems to be my obstacle doesn't it?). So that is on my design wall today. Decisions to be made... 4 or 6 wraps of the ribbon?, all one color?, which one? or a combination?  I think I know what I want to do, but I will go through the process so you can tell me what you think, just in case I am out of my mind.

First I decided that I would not shoot for a 'realistic' ribbon with lots of shading and twisting with each wrap. It would never really look realistic and it would be better to make it representative, to get the feel of the wrap without having it try to duplicate the actual details. Then once I had the shape done in paper, how many would fit and look right? Four looks right for a single ribbon wrapping the wreath but it still looks a bit sparse. Odd numbers are usually good in design, but five was just wrong in this case, no spacing looked right with five. I moved onto six (and this photo shows more of the border). I like the six.


Next came the color... I pulled reds from my stash and choose the best one. Then I noticed a nice gold I had laying out for something else and thought that might be nice too...  

all red - a little dark, monochrome look

all gold, nice but not as matchy...
I was surprised to see what jumped out with the different colors. The red border, obviously stands out with the red ribbon, but it looks a little monochromatic because there is so much red. The tan element and the pine cones and nuts in the border print are really emphasized with the gold ribbon. Then my final idea was to divide the 6 wraps into groups of three and do half in red and half in gold.


So what do YOU think?

Argh! Looking at these photos and knowing that I have a little bit of the gold left and a few yards of the red I am now thinking that maybe I could add a couple borders to echo the ribbon in the center (narrow gold, wider red) and make the top a more respectable and usable size.... NOooo! I want to be DONE! Well, I have to go put the fabric for the backing in the drier (I washed the red so minimize the chance of bleeding). Sigh, more decisions!

What is on YOUR wall today? Check out the blogging world's walls over at Patchwork Times.

Friday, December 2, 2011

Pattern Inspiration

OK, I have decided the only bad thing about using Thanksgiving week as a fun vacation week is that you must come home, unpack and clean up and THEN launch yourself headlong into the Christmas preparations. I feel totally unprepared mentally for all that is coming in the next few weeks (three kids equals lots of holiday fussing at school not to mention at home).

ANYWAY... I have gotten a little time this afternoon to work through a couple of the pattern inspirations I had over the break...
The first was inspired by the lacy inset part of my swim cover-up (the one that, when wet does not entirely protect me from the sun - ouch-  which is the same one that is now permanently stained yellow by spray sun screen - I am thinking of tie dying it!). This is a scan of it...
It looked as though you could make the circles using all straight lines and I love that sort of pattern. I tried to break it down and came up with a satisfactory, if not perfect pattern that resembles it called "Islette" a play on both the eyelette lace and the island place I noticed the pattern. There are many steps to the pattern, but none of them are difficult. You can get different looks depending on the relative vertical and horizontal spacing of your grid.


It also looks as though you could make it be a layer 'on top of' another pattern.  I began a drawing with it here...

but when I drew something 'under it' it just all muddled together and it was not a good look. Oh well. I am sure to try this again. It is not a pattern to do if you are in a hurry because it has lots of structure, although I think it takes on an interesting look even when it gets wonky.
The second pattern also takes some time, but is much more free-form. I call it "Brainz" because it was inspired by Brain Coral. Those little coral animals (and diatoms) are the undisputed masters of FINE structure. Here is my example...

 This pattern follows the form of a type of quilting called meander quilting or stippling (when it is smaller). I have done this kind of quilting on a few things and it definitely take a certain detachment from your left brain to not get yourself into a tight spot. The lines should never cross and ideally should stay an equal distance apart. All this while not getting overly repetitive and filling in your given space evenly. Once you get the hang of it it goes pretty quickly. Then, just a few steps later you have a nice curvy yet linear pattern (OK, so those might be mutually exclusive, but hey - see for yourself)

I like how you could elongate the straight lines to make it look a little 3D if you needed to like the back side of that chunk pictured above. 


Then I have two other things I would like to 'patternize' but I am having trouble with one of them and the other I just haven't had the time to think about. The first is another coral skeleton (I think).              I love how this one could go either way, dark lines on light like the top or dark spaces with light lines, like on the bottom. This kind of natural branching is one of the hardest things to duplicate from nature. Can it even be broken down to a tangle-like pattern?

The last one is the general pattern of scutes on the back of a turtle. I was thinking specifically of sea turtles, but don't have a good shot of one of those and really the pattern is about the same from sea to land turtles (this one is a little box turtle from the woods here at home). I'll be sure to post the results from either endeavor  if I ever manage to think about them long enough to do the breakdown.

I thought of a holiday quilting project I would love to finish for the holidays so I think I will work on that this weekend and try to get more in the mood for the season. That and decorating with the kids may do it for me. I will admit that last night's annual meeting with the big man (Santa himself... the REAL one) did edge me toward a holiday attitude. My daughter really didn't want to talk to Santa at all, but her big brothers went up so she went too. Mrs Claus offered her lap and my girl will always pick a woman over a man so she accepted. After Santa talked with the boys he leaned over and made friends. They had quite the intense conversation there for a while.


Have a great weekend!

Wednesday, November 30, 2011

Playing Catch Up

OK, So I was AWOL for a while over the Thanksgiving break. I did dabble in doodling and did a little applique, but not a lot. Since I've been back I have been feeling 'out of the groove' with my tangling. I have totally fallen in love with Socc, the new pattern that was presented at Tangle Patterns. Oh, its like magic how it transforms. I have been working on breaking down a couple of patterns inspired by vacation things as well.

First, lets get to the challenge from the Diva this week. BIGGIFY. This was an interesting excersize and I don't think I'm done yet experimenting with it, but I have one that I am fairly happy with. It is interesting because the pen line width does not biggify along with the rest of the pattern when you draw big so it totally changes the character of a lot of patterns.  It was a good thing to try for me right now because I have been drawing really small lately. The longer lines do take more concentration and are more easily accomplished when drawing on a table and not on my lap as I tend to do (because I am usually doing it on the go). Here is my challenge entry...

I was actually intending to use Socc in that middle section but was concentrating so hard on getting smooth lines I ended up doing the first section incorrectly so I just made the rest up. 'No mistakes' right?

I also have a lot of drawings to catch up on for Art Every Day Month since this is the LAST DAY! I missed a few days while away and spent several days working on sections of a single drawing, but there still seems to be a backlog...


I had those lovely repeating patterns on shells on my mind right before we left, as we were headed to a great snorkeling location. So, not really a tangle... but some of the patterns in the shells have that same feel to them.


This is the one I worked on for several days. Fife takes a long time when done on this scale! Magma is just the right pattern for the gentle ocean waves and I am sort of in love with Whirlz... it is very meditative and would translate really well into quilting. In fact there are several versions of this in the Free Motion Design Project over at Day Style Designs. 


I just kept adding to this one because I didn't like it. It was the first one I did entirely after we got back... not yet in the groove. I do sort of like the square border with the open spaces... I will have to work that one out again since it just grew a line at a time as I added things trying to get to something I liked. The feathery one is inspired by a free motion quilting pattern by Leah Day called Tongue of Flames. This is a lot bigger than I typically have been practicing it so this is sort of a precursor to my BIGGIFY challenge entry. Leah's pattern and a video of her quilting it can be seen here.


In this one I tried another new pattern I picked up at Day Style Designs Free Motion Quilting Project,  Fossil Snail and used Whirlz as a line treatment instead of a filler.


This one I just did early this morning. Finally a chance to use Socc! And another example of Tongue of Flames and a new-to-me tanlge, Esses. 

Monday, November 28, 2011

What's on my wall today?

There isn't much new on my wall, but there is a lot on my to do list! While I was gone on vacation I did manage to finish appliqueing the Grandmother's Flower Garden doll quilt body to the borders I whipped together before we left. I think it will be bound in green and I need to come up with something for the backing so I can start quilting it.

We were gone snorkeling and having ocean adventures for 7 days and had a great time. Lots of pattern inspiration for both fabric and Zentangle and maybe next week I can layout all the batique fabric I have been saving up for my coral and fish quilt that I am planning in my head and feature it in a Design Wall post. I still have to finish my Hearts of Gold crumb quilt too, along with a few other Christmas presents. Word on the street is that my daughter will be asking Santa for a new dress for her rag doll that I made her last year so this little elf better get busy! For more of what other quilters are up to this week head on over to Patchwork Times for Design Wall Monday.

Later this week I hope to post a few of those new zentangle-ish patterns inspired from my travels. Of course, I will also be checking out the weekly challenge over at The Diva's site and trying to lay my hands on a actual Zen Tangle Tile so I can participate in the Red String Challenge. Have a great Monday!

Wednesday, November 23, 2011

One last fun art exersize for both child and adult

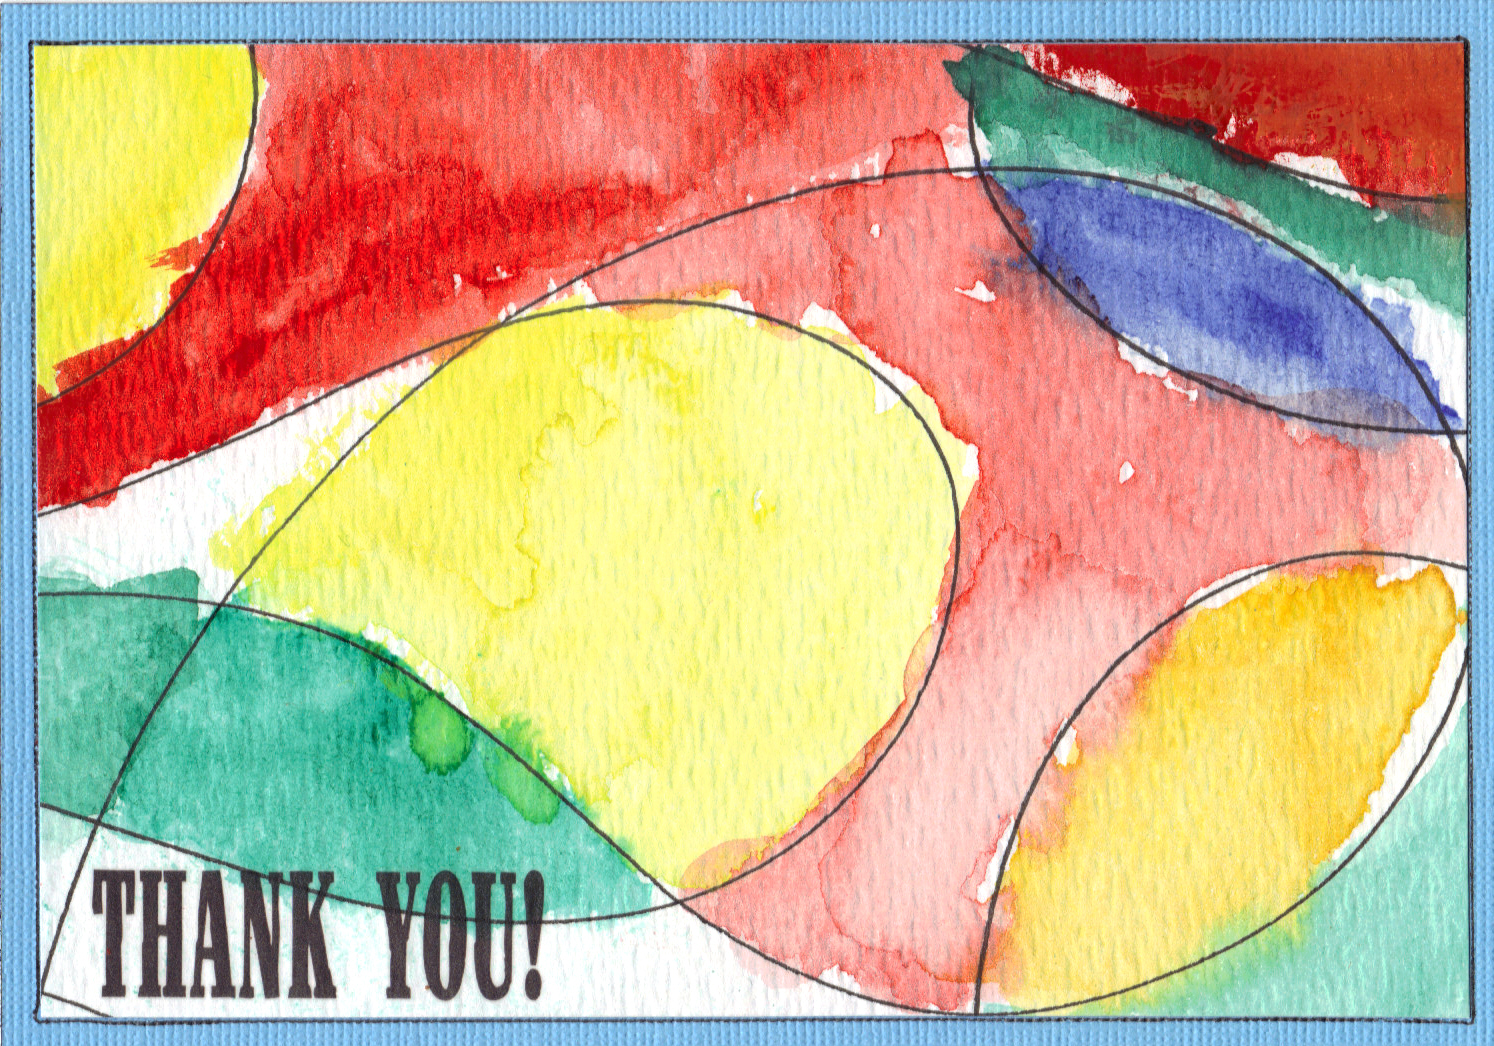
OK, I promise, this is it. This was one of the other activities in the 'art in the park' activity I did with my boys a few years back. They were given a white paper and a fine black permanent marker and told to do loopy or zigzaggy lines all over it, leaving some spaces between. Then they got watercolors and brushes and were told to fill in some of the spaces between the lines with color, whatever spaces and whatever colors they wanted. These turned out to be pretty cool looking. Again, I cut out the 'best' parts that had good composition and matted them with card stock for use on note cards.

In this case we used rub on words and the boys used them for teacher appreciation notes one spring. I think they turned out great. It looked like so much fun I did several sheets of paper as well. In a way, the black line is much like a zentangle string. In my case I did not fill in as much of the space as the children did, but left a significant amount as 'negative space'. The overlapping and interlocking shapes leave lots of room for color transparency and overlap experimentation. Having no formal watercolor training leaves me lots to explore when it comes to my paints.

The youngest boy did this one
These cards have been so useful as things to have sitting around ready to fill in when needed. A few rub on words can set the tone, or you can get the appropriate tone or season from the colors used in the card. I think the same large string technique could be used to incorporate both tangle patterns and watercolor to achieve a different kind of look as well.


This one looks like spring to me

That is all of the card talk I have on my mind right now. I hope everyone has a wonderful Thanksgiving holiday (for the US residents) and I will be back to posting quilting news and zentangle attempts next week!
I like to play with the 'temperature' of a range of colors

Tuesday, November 22, 2011

More card talk

It is no secret, kids love to make art.  I absolutely think they should be encouraged and praised for the self expression... but what do you DO with it all? I have a couple of walls in my house with arrays of inexpensive frames from Ikea that fit a regular piece of paper, with minor trimming, easily. That is where a lot of it goes. I have a few noteworthy pieces from school art class framed and matted in "real" frames. I have discovered another use for certain types of art... I have used certain kinds of art to make very modern looking black cards (for mailing as 'Thank You's etc). We had attended an "art in the park" experience and the boys were introduced to modern art and invited to splatter, swipe, roll and smack paint onto the backs of donated posters. They turned out great, but they were huge and some areas were more expressive than others. So, after storing them behind a bookshelf for a couple of years, I came up with this idea. I cut them up, somewhat at random, somewhat by eyeing what the best compositions would be and chose card stock paper to compliment the colors in the painting as narrow mats. With a little ink on the edges and some torn edges in a few cases to add interest they came out looking like something you might purchase at the gift shop in the art museum.  These are just a couple of examples.


On a nice white card with rub on letters as greeting if appropriate they make smashing cards that are a far cry from the ordinary. And each one is an original work of art!  I have since encouraged them to make this sort of thing for specific purposes. One Valentines Day I gave my 18 month old daughter pink, purple, yellow and red water color pencils and a sheet of watercolor paper. She had a great time scribbling. Then I gave her a wet kid's paintbrush and she 'enhanced' her art work. When the whole thing was dry I cut out freehand hearts from the paper, inked the edges, mounted them on cards and added stamped letters... Valentines for the grandmothers and great grandmothers from their favorite baby girl!


I think a lot of kids art work could be treated this way with great results. It might even teach the kids that sometimes it is OK, even preferred to send a snail mail greeting to a loved one rather than an email or a text. And don't even get me started on the need to remind them about the importance of thank you notes!

I have one more art/card idea to share, and then I will get back to the regularly scheduled programming of quilting and zentangling!